Sunday, July 29, 2012

Guilt-free granola

Photos: Sriram Narayanan

As much as I love baking goodies, not everything I make is rich, sweet, buttery and calorie packed. In fact, ever since I started on an exercise routine around three months ago, I have been at my wit’s end, trying to eat right. And this has more to do with how often I eat than what I eat.

After a month of regular exercise, I realised I had lost more muscle instead of fat; an extremely unhealthy weight loss that one usually associates with fad and starvation diets. 

Now, I am clearly not the sort of person to go on a fad diet. It was, I believed, the other way round. I had been exercising and eating healthy. Starting the day with fruit, increasing my lean protein (egg whites and skinless chicken) and fibre intake, eating lots of greens and whole grains, the works.

Therefore, the sudden muscle loss was a bolt from the blue.
After going over my daily eating habits, what my dietician told me came as a revelation. The problem was my eating too little and not as often as I should. The right way of going about it was to eat a small, healthy snack every two hours (yes, you read that right). A handful of toasted peanuts between breakfast and lunch, a few almonds and a couple of walnuts after lunch; hell, apparently, even an occasional cheese slice constituted good snacking!

Since then, the enthusiastic cook in me has been busy devising ideas for small snacks that are tasty, very healthy, filling and easy to pack on the go. And these cardamom and banana granola bars fit the bill perfectly. The oats in these bars ensure a slow and steady release of glucose in your bloodstream, so you feel full for a longer time. The almonds, pumpkin and sunflower seeds in the bars are protein packed, apart from being rich sources of good fats or Omega-3 fatty acids.

All natural, easily-made-at-home granola bars Photos: Sriram Narayanan
Moreover, unlike store-bought granola and “energy” bars that contain artificial sweeteners or sugar substitutes, these moist and chewy homemade bars are all natural, made with raw cane sugar, a bit of honey and sultanas, and unsweetened fruit puree.


Oats, almonds, sunflower and pumpkin seeds pack a protein punch in these bars


I gave the bars a slightly Indian kick by adding in crushed cardamom and mashed bananas to the granola mix, which lifts them several notches higher than any other granola bar I have tasted recently.
Melt raw cane sugar with oil, banana puree and honey on a low flame Photos: Sriram Narayanan
On a particularly rushed day, when you are racing from the office to a client meeting across town, these granola bars make for a satisfying, tasty snack between meals.
Cut the baked granola into bars when still warm Photos: Sriram Narayanan
Happy eating!

Cardamom and Banana Granola Bars

Ingredients
3 cups oats (270 gm)
¾ cup (100 gm) almonds, chopped
¾ cup (90 gm) raisins or sultanas
½ cup (100 gm) sunflower/pumpkin seeds
11 cardamom pods, crushed finely
½ cup (120 gm) raw cane sugar or light brown muscovado sugar (I use Waitrose, which is available at HyperCity outlets)
¼-cup honey
½ cup (150 gm) unsweetened fruit puree (I used ripe elaichi bananas)
½-teaspoon salt
1-tablespoon oil

Method

Preheat oven at 160C.

Blitz one cup of oats in a mixer to a fine powder. Mix this with the whole oats, chopped almonds, raisins, and pumpkin or sunflower seeds in a large bowl.

Place a pan on low to medium heat. Add oil, honey, raw cane sugar, and the fruit puree and stir until the sugar melts fully. Remove from heat.

Mix the dry mixture well into the melted cane sugar mixture. Spread the granola mix in a greased, square baking pan and pat down with a spatula to smoothen and even the surface. Bake for 30 to 40 minutes until golden brown.

Remove from oven and cut into squares when still warm. Let cool before storing in an airtight container.

Tuesday, July 17, 2012

The Best Homemade Double Chocolate Biscuits

I love a good biscuit. And a really great one (in my book) is one that is crisp, crumbly and packed with a flavour I love. I am not a big fan of biscuits that are too dense or moist; except for an occasional chewy chocolate chip cookie.

As a kid, biscuits were always store-bought, never made at home. They were either packaged varieties bought from the local grocery store, or the unbranded (but several times more scrumptious) nankhatais or coconut makrooms sitting in large, glass jars inside grubby, roadside bakeries.

My favourite was the crisp, cracked ginger biscuit that used to be sold by the kilo at most neighbourhood “dry fruit” stores in Bombay. These biscuits were a rich brown colour, and had a spicy flavour of ground ginger. Another relished variety was the oval-shaped Jim Jams (if I recall the name correctly), sandwiched with cream and fruity jam in the centre. The biscuit was nothing to write about, and was tooth achingly sweet. But the real fun lay in prying apart its sandwiched halves and licking off the creamy jam before eating the biscuit.

The only store-bought variety of biscuit that seemed to lack any appeal for me was the simple chocolate biscuit. Till date, I haven’t eaten a store-bought chocolate biscuit that has really hit the spot and made me reach out for seconds (grand chocolate cookies in fancy coffee shops included). They just didn’t seem to pack a strong enough chocolate punch, and were usually too dry and floury with an insipid cocoa flavour.

Which brings me to the real purpose of this blog post. As I discovered quite gleefully this week, it is deceivingly simple to bake a batch of crisp, eggless, double chocolate biscuits at home.


Minimum effort and maximum flavour guaranteed. Once you have given these a try, you will avoid packaged chocolate biscuits whenever possible. It took me a little over 60 minutes to make these; all from gathering the ingredients to tucking away the cooled biscuits in a container. No exaggeration.

All you need is butter, sugar, cocoa, flour and some milk chocolate.

The secret to this recipe’s success is its butter-sugar-flour ratio. If I have to nitpick, I will have to say that this is more a recipe for an intense chocolate shortbread than just a chocolate biscuit. Shortbread is a type of Scottish biscuit, made using one part sugar, two parts butter and three parts flour. And it is this ratio that I have more or less used in my double chocolate biscuit recipe.

Shortbread is named so for its ‘short’ or crumbly texture. This texture is a result of the high butter content in the dough, which hinders the formation of long protein strands (called gluten) in the flour. It keeps the biscuit dough from being stretchy and elastic, and the biscuit itself from being too hard.

What you get instead is a rich chocolate biscuit with a delicate, buttery crunch. And the cocoa and the milk chocolate deliver that much-needed double dose of chocolate in this recipe.


Trust me, it’s a cup of hot chocolate in a biscuit.

Double Chocolate Biscuits

Ingredients

180 grams salted butter, softened
90 grams caster sugar
220 grams flour
3-4 tablespoons cocoa
100 grams of any cooking dark or milk chocolate, chopped into bits

Method

Preheat oven at 160 degree Celsius.

Mix together the softened butter and caster sugar in a large bowl. Add the cocoa to the flour and set aside. Alternately, add in chocolate bits and flour mixture to the butter. Gently pat the mixture and bring it together.

A tip to ensure that crumbly texture is to handle this biscuit dough very delicately. You may gently pat it and bring it together into a ball; but DO NOT knead or stretch it as if it were chapatti atta! Doing this will only activate the gluten in the dough and make the biscuits rock hard.

At this stage, the dough will be very soft and crumbly. Divide it into two parts and roll each of these parts into a cylinder (5 cm diameter or so).

Cover and freeze for around 20 minutes. Cut into disks of 1 cm thickness and lay on a parchment paper placed on a baking tray.

Bake in the oven at 160 degree Celsius for 12 minutes. Remove them from the oven and leave them on the tray for 15-20 minutes before storing them in an airtight container. 

The biscuits may still seem soft when you get them out of the oven. But they will harden as they cool.


Monday, July 9, 2012

What is your favourite food memory?


If I were to ask this question to most people I know, the answer would most often be a food that they particularly relished in their childhood, made by someone they love.

For some, a favourite food memory would probably consist of an ever dependable, simple flavoured comfort dish that they grew up eating with the family. For others, the memory could be a rare treat that they eagerly awaited on special occasions.

In my case, it was the latter.

My fondest food memory is about everything that went into making and eating a warm slice of homemade cake, packed with plump, hot raisins and walnuts. My first ever memory of a cake, any cake, is this one. My mother would inevitably bake it on a day off from work, usually a Saturday. However, the best part was that I never knew if it was going to be a ‘cake Saturday’ on a given weekend.

It was only after we ate our lunch, and my mother began assembling the cake ingredients that I would happily realise what a scrumptious afternoon laid ahead. 

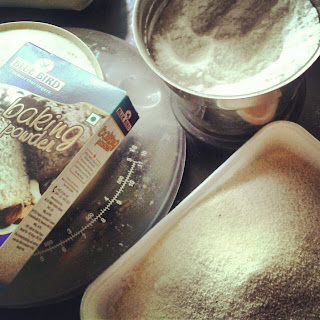
cake ingredients

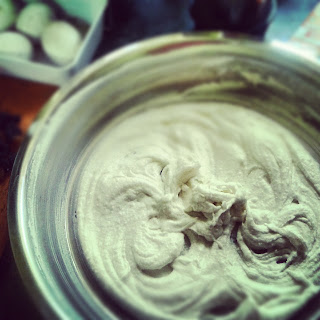
I would watch intently as she first whisked the homemade butter and fine sugar by hand in a really wide and deep steel dish (electric hand whisks and stand-in mixers were yet to make their debut).

Fluffy butter and sugar for cake

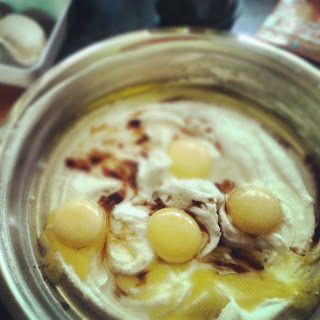
Eggs would then be added to the creamy white batter along with vanilla, one at a time. 

eggs and vanilla are added to a cake

Back then, flavouring a cake with vanilla meant opening a tiny bottle with a blue and orange label that read Viola’s Vanilla and pouring some of it into your batter. I would have laughed then had someone told me that you could scrape some beans into a cake for a nicer flavour.


To this day, sniffing that bottle of ridiculously synthetic vanilla flavouring makes me think of cake.

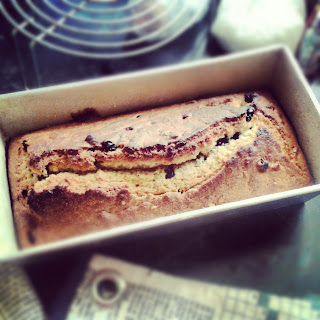
The batter would be ready for the oven once the flour and chopped walnuts and raisins were folded into it. We had a large and round aluminium oven, with a glass lid on top, which enabled you to check on the rise (or fall) of your cake right to the finish.

lovely loaf of walnut and raisin cake

Fifteen minutes into the baking, our flat would be redolent with a scrumptious aroma of the most deliciously nutty cake. All you had to do after that was wait. Just wait until the cake baked through with a perfect brown crust, and had suitably cooled in the oven to be taken out, cut and eaten.


Sinking my teeth into that first warm slice was satisfying beyond words. It was the perfect Saturday afternoon treat. The cake would be soft and moist, and flecked with hot raisins that would have plumped up to their old grape selves during their time in the oven. If my father happened to come home early from work by some great stroke of luck, we would have a great evening tea with that cake for company.

No doubt, it remains a great cake to make on a relaxed weekend and share with friends and family over a lovely tea.


Nostalgia Cake

Ingredients:

100 gm flour
50 gm semolina (rawa)
130 gm caster sugar
25 gm demerrara sugar
150 gm salted butter (softened; I use Amul)
3 eggs
60 gm chopped walnuts and raisins
2 tsp vanilla essence or 1 vanilla bean (slit lengthwise and scrape seeds out)
1 and a 1/2 tsp baking powder

Method:

Pre-heat the oven at 160 degree Centigrade or at 130 degree Centigrade for an oven with a fan. Grease an 8-inch (20 cm) round baking tin or a 7-inch (18 cm) square baking tin with butter and dust it with flour.

Sift the flour, semolina and baking powder and set aside.

Cream the softened butter until pale and fluffy in a large bowl with an electric hand whisk or a wooden spoon/spatula. Add the caster sugar to it, bit by bit, until fully incorporated. 

Whisk the eggs and the vanilla together until very frothy. Gently fold in the eggs into the butter mixture with a spatula.
Do not over mix or the batter will lose all the air bubbles that are going to make the cake light and fluffy.

Similarly, fold in the flour mixture and the nuts and raisins, bit by bit.

Pour batter into prepared tin and bake at 150 to 160 degree Centigrade for 35 – 40 minutes or until a knife inserted into the centre of the cake comes out clean. Let the oven temperature fall gradually over a few minutes before getting the cake out.

Slice and serve with tea, coffee or even hot chocolate.

Sunday, July 1, 2012

Warming up


I can only admit this sheepishly. I am one of those people who are thinking about lunch, even as I polish off a hearty Sunday breakfast. Inviting friends or family over for a meal usually involves me daydreaming about the menu, shopping lists, and the looks on my guests’ faces as they dig into my food.

Cooking, eating, reading, and writing about food, I love it all.

Thanks to being part of a family that enjoys cooking and eating great food in equal measure, I grew up eating delicious and healthy home-cooked fare (mostly coastal Maharashtrian). Simple weekday meals would consist of the staple amti (a curry made of a variety of sprouted pulses), vegetables, chapattis and rice, while fish and mutton curries were Sunday treats.

Moreover, as much as I enjoyed eating all that delicious food, what was also deeply satisfying was watching the final dish take shape, from the kitchen to the table. At first, I loved watching my mother cook. The angry crackle of a garlic tadka that would go into a spicy dal, the deft stir-frying of a potato bhaji, and the softest phulkas that would billow up as she cooked them on a naked flame; all that action in the kitchen reeled me in early.

By the time I was in college, I had graduated from being an occasional kitchen helper to a weekend cook who would try to impress the family (my parents that is) with novelty dishes, especially desserts. Soon, they began eagerly awaiting my Sunday culinary experiments. From handmade fresh pasta, chocolate fondants with oozy centres, brownies, and salads, stir-fried veggies, tarts, to trifle puddings, I dropped all culinary inhibitions.

From then on began my real discovery of food – in terms of new tastes, textures, smells, and of course, ingredients.

Today, as a late twenty-something living in Bombay with my husband, our kitchen may be coastal Maharashtrian and vegetarian Tamil at its heart. Nevertheless, our general cooking and eating styles swear allegiance to no particular cuisine in the world. Whether it is a plate of piping hot, pepper-specked pongal with ghee and coconut chutney, or a roast chicken with steamed veggies and mashed potatoes on the side, we wolf down both with equal gusto.

By writing about food on my new blog, The Treat Company, the hope is to embark on a food journey and make some like-minded friends along the way. The journey will sometimes tread new ground; while at other times, linger on with old favorites.

Either way, it will always be a celebration of good food.

Bon appetit.

The Treat Company: July 2012

This page has moved to a new address.

The Treat Company